If you want to tag several contacts at once, you can use the "Bulk Tagging" feature.
First, select the contacts you want to tag. You can do this by filtering contacts by needed parameters (the little arrow next to the search box), or manually picking them (1).
Then click on "Add" tag (2) in the top control bar, which will show up, and that will open the bulk tagging dialog box (3).
In this window, use the arrow or search to select the label you want to tag your contacts with.
(4) You can use the advanced module that we explain at the end of this article.

You can tag individual contacts in the details of each contact. First, click the contact you want—on the left side you'll see the Labels field (1).
When you open the dropdown (2) by the label, you'll see a list of labels (3). Click the one you want to use it for this contact—remember, a contact can have several labels at once. To remove a label, just click the cross next to it (4).
To create a brand new label, click the “+” icon (5). The label you create gets saved to the contact right away.

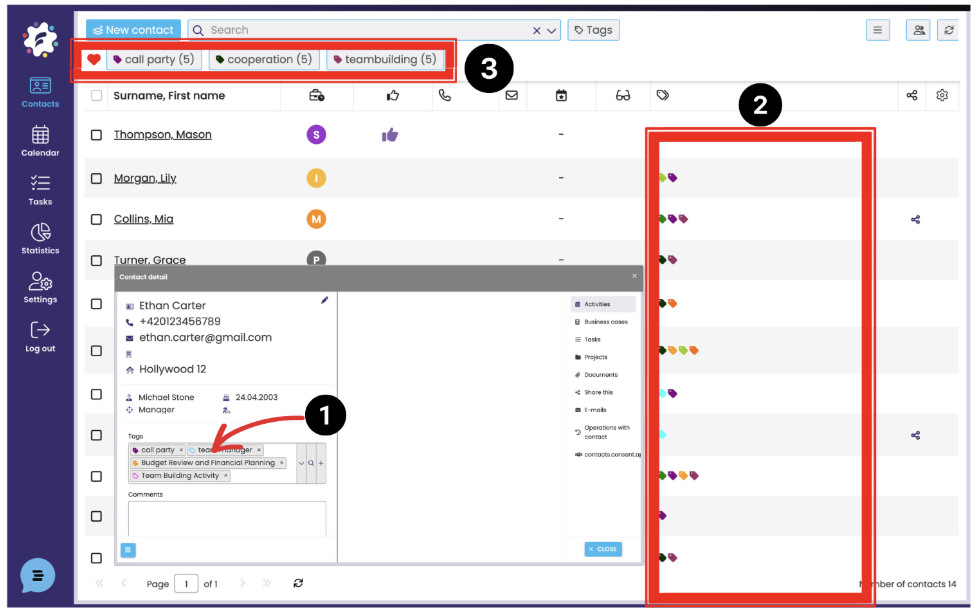
In the details of each contact, you can see which labels the contact is marked with (1). The same goes for the Labels column in the contact list (2). With favorite labels (3), which show up on the top bar, you can also see how many contacts they include.
After you click (4) a dialog box will open, in the right part of which you will find a help for the graphical resolution of the marked labels (5). On the left you will find your structure including the contained labels (6).
Here you check (7) the labels you wish to use for all selected contacts. Those that are already marked with this label will remain marked. To check a box, click on the label.
Blank fields (8) indicate labels that will not be applied to any of the selected contacts. For contacts that are already labelled with this label, the label will be removed. If you want to unlabel all selected contacts, click on the label and leave the field blank.
Fields that are coloured (9) indicate that some of the contacts are marked with this label. If you leave the field coloured, the label remains unchanged (the label is not added or removed anywhere). Click on the label to change this to one of the two previous options.
When you have finished setting up the change, click Save (10).

