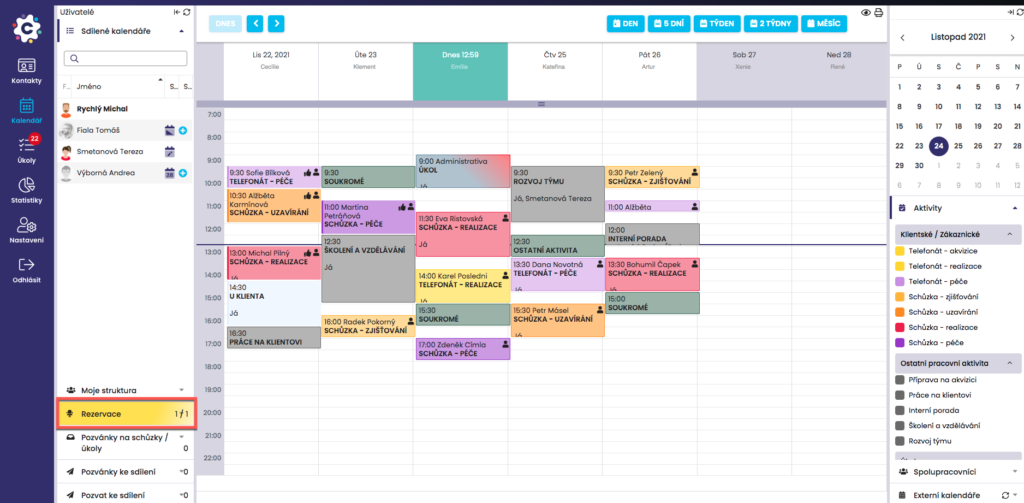
In the system, when entering an activity into the calendar, you can also book a meeting room or, for example, a data projector for training. Coordinate with your team and use the FreshFlow calendar to book your shared resources (rooms, projectors, cars)!
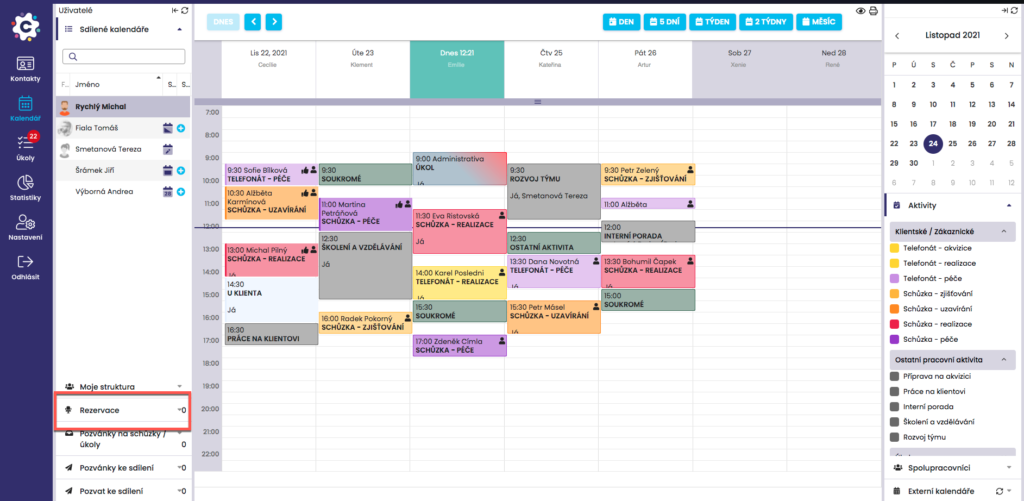
You can find room/resource booking in the Calendar module in the left column under the Reservation tab.
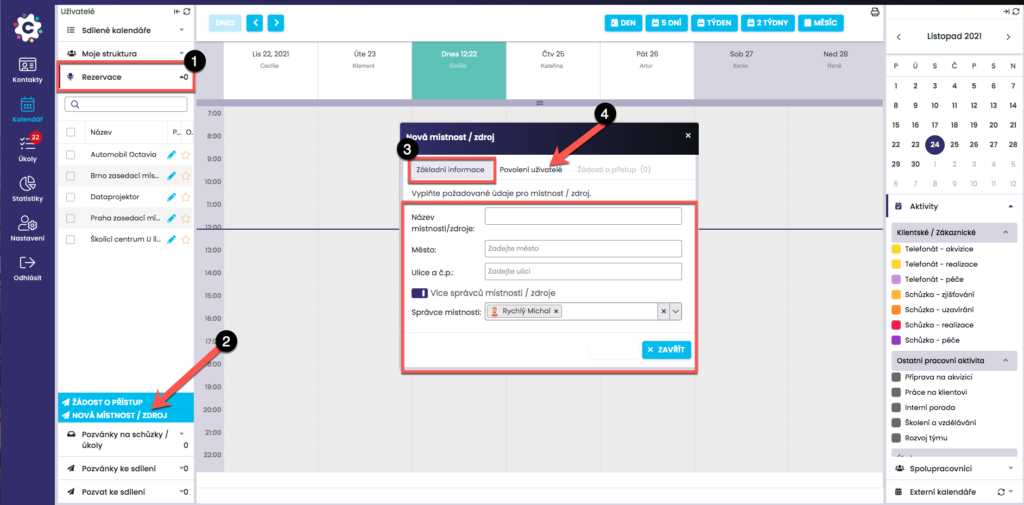
Click to open the Reservation tab (1). After expanding the tab, click New room (2). A new dialog window will open, where you define the new room/resource in the Basic information tab (3) by entering the required data (City, Street and building number, and Name of the room/resource).
The name of the room/resource is very important, as the resource will be displayed under this name in the list of resources. We therefore recommend carefully choosing a name that will specify the given resource as precisely as possible, for example TOKOVO 7th floor – green meeting room, or Ruby House, office Jan Novák.
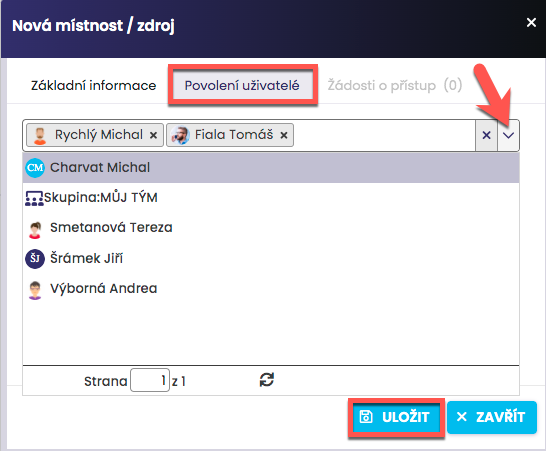
If you have set the basic information about the Resource, click on the Authorized users tab (4), where it is necessary to define which users will be allowed to make reservations for this room/resource.
You can enter individual persons by typing the Surname and First name in the field, or use a preset or your own custom-created group (alias). More about groups HERE.
Confirm the settings by clicking the Save icon.
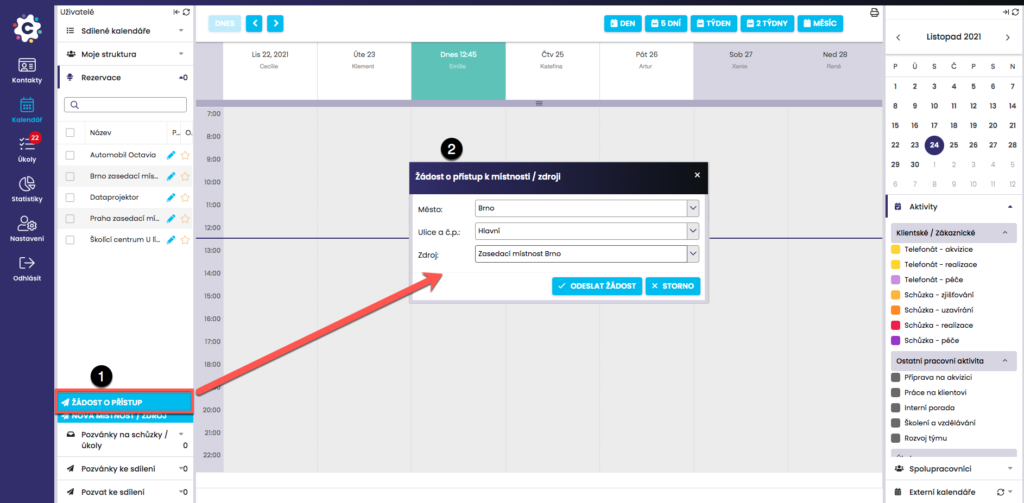
If a manager creates a room/resource for reservations and you do not have access to it, you can request access to the reservation room/resource by clicking Request access (1). In the new dialog window (2), select the City and Street where the reservation room/resource is located, and in the Resource field select the available rooms/resources offered. Confirm your request by clicking Submit request.
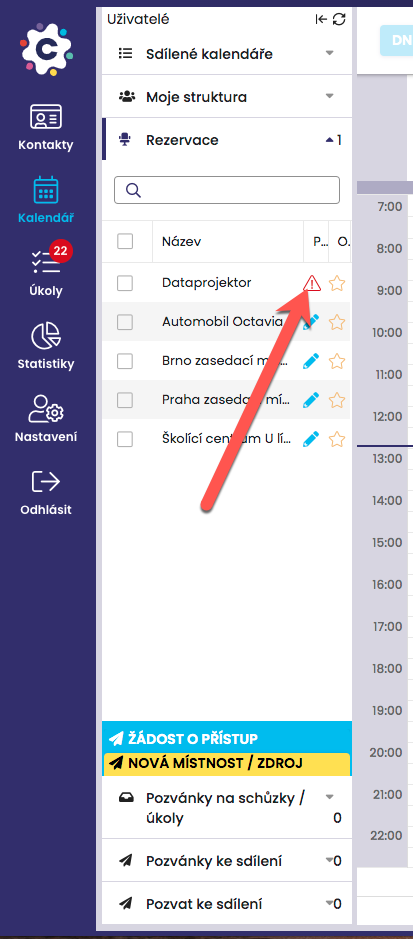
If the Room/Resource Reservations tab contains a new request for access to a resource, it will be highlighted in colour.
After opening the Room/Resource Reservations tab that contains a new request, a red triangle will be displayed next to the resource to which the new request relates, indicating that someone is requesting access to this resource. By clicking on it, a new window will appear in which you can approve or reject the access request.
In the Access Requests tab, your current requests will be displayed. You can grant access to this resource by clicking Allow access or Reject. Confirm the settings by clicking Save.
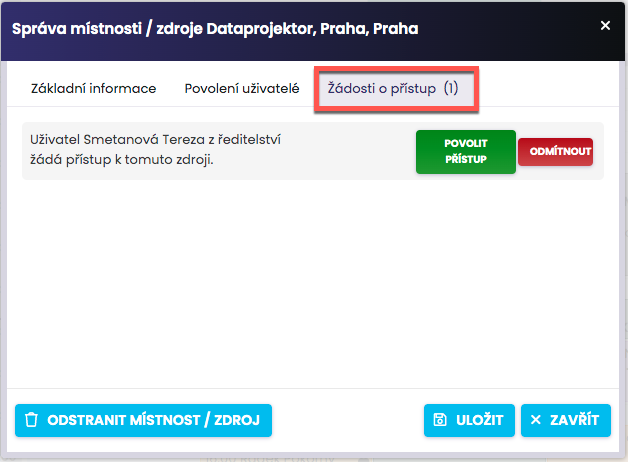
Once the request has been confirmed, the reservation resource will appear under the person who requested it, specifically in the Resource Reservations folder. The resource can then be used.

