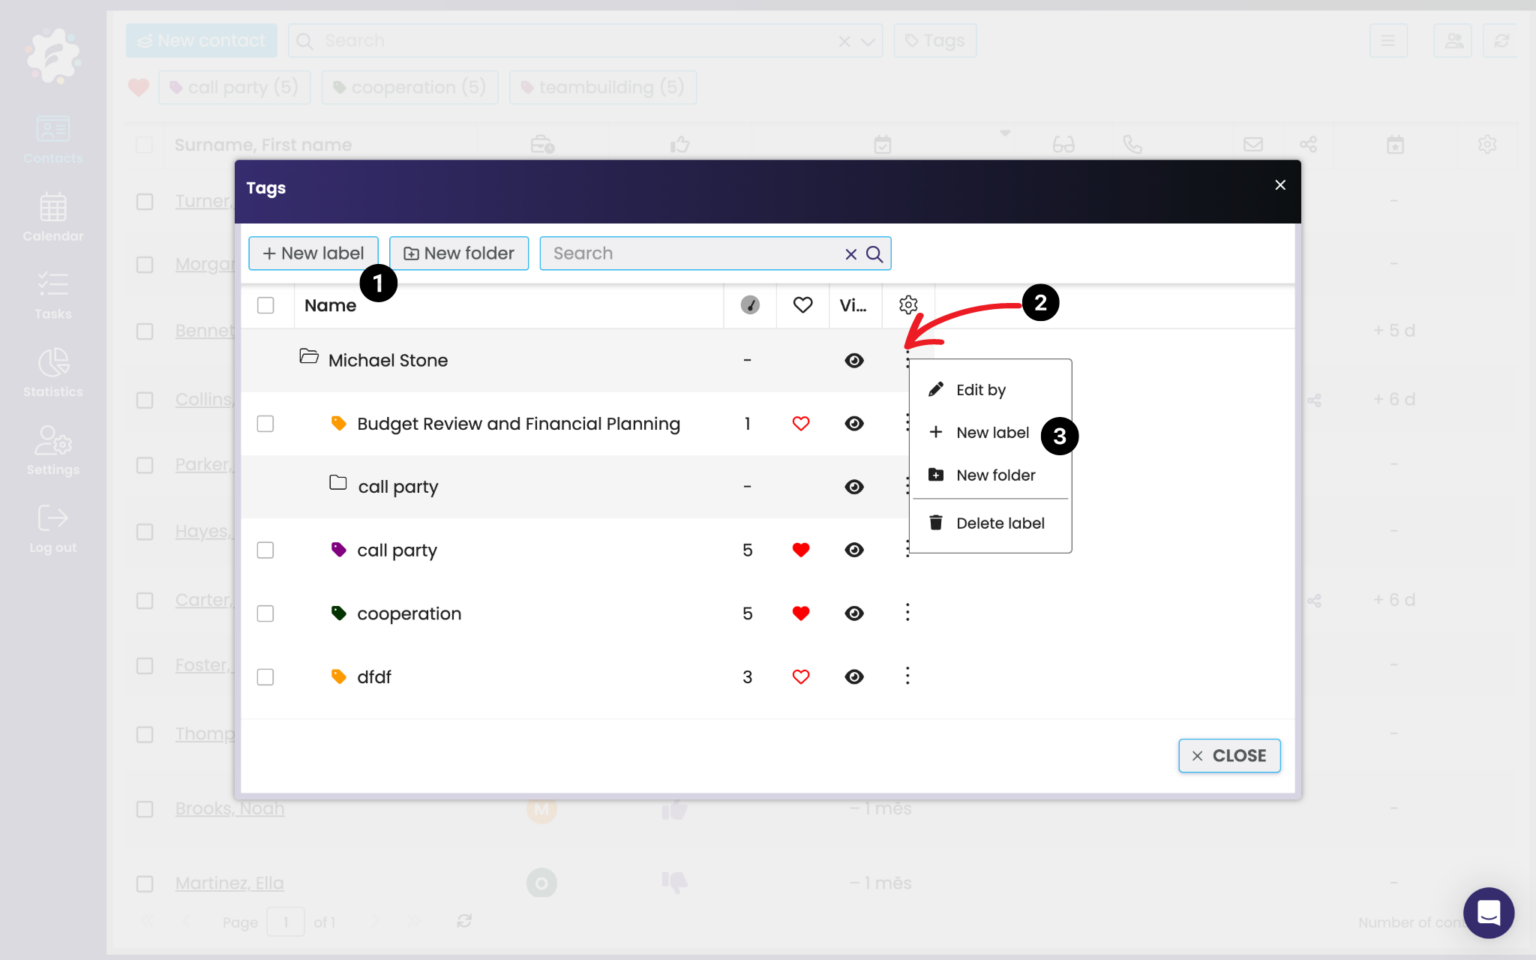
First, click the Tags button on the homepage of the Contacts module. A window for creating and managing labels will appear.
You can create a new tag in this window by clicking + New label (1), or by right-clicking the three dots (2) > + New label (3).
A new window will open, where you type in the label name (4), its place in the folder structure (5), you can check “Favorite label” (6) – that way the label will show up right in the main bar in contacts (for easy and fast filtering).
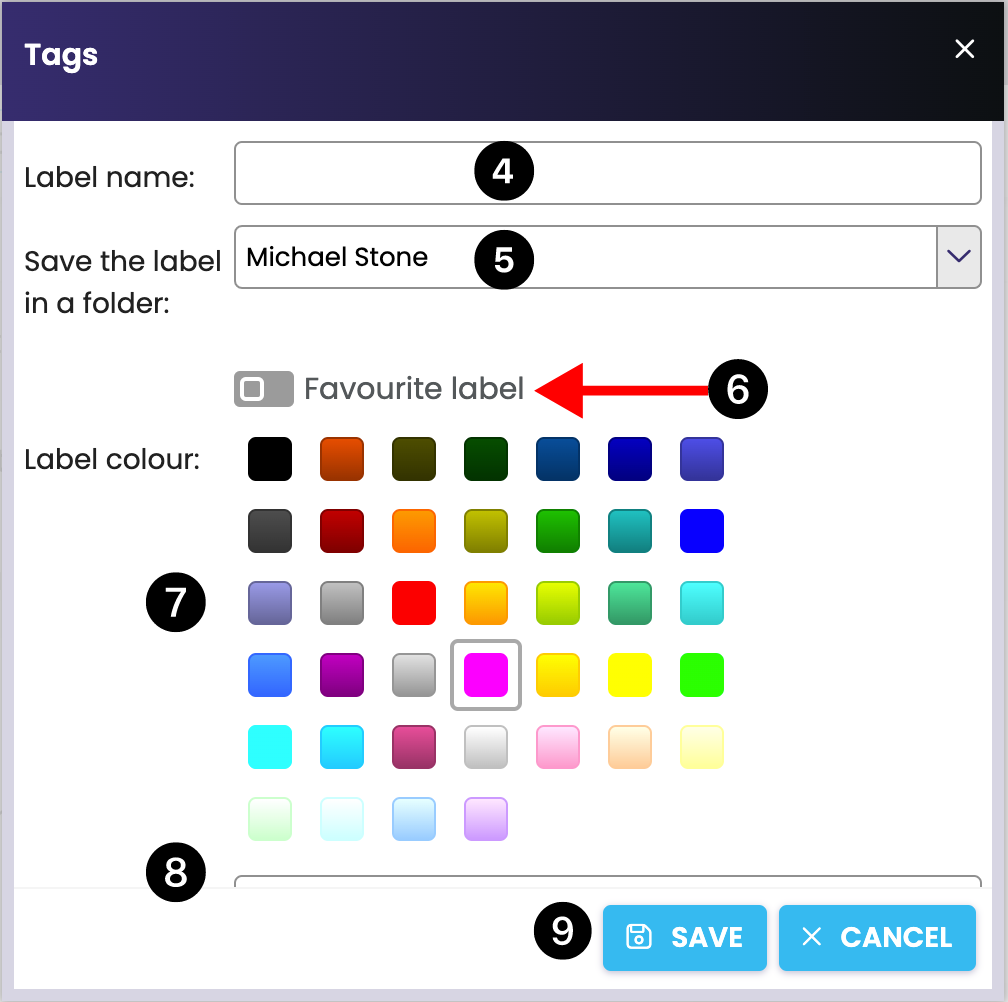
Next, select the color (7) you want. You can also enter a Note for the label (8). Clicking Save (9) will save your new label, and it’ll show up in the folder you picked, or on the main Contacts page (if you marked it as a favorite).
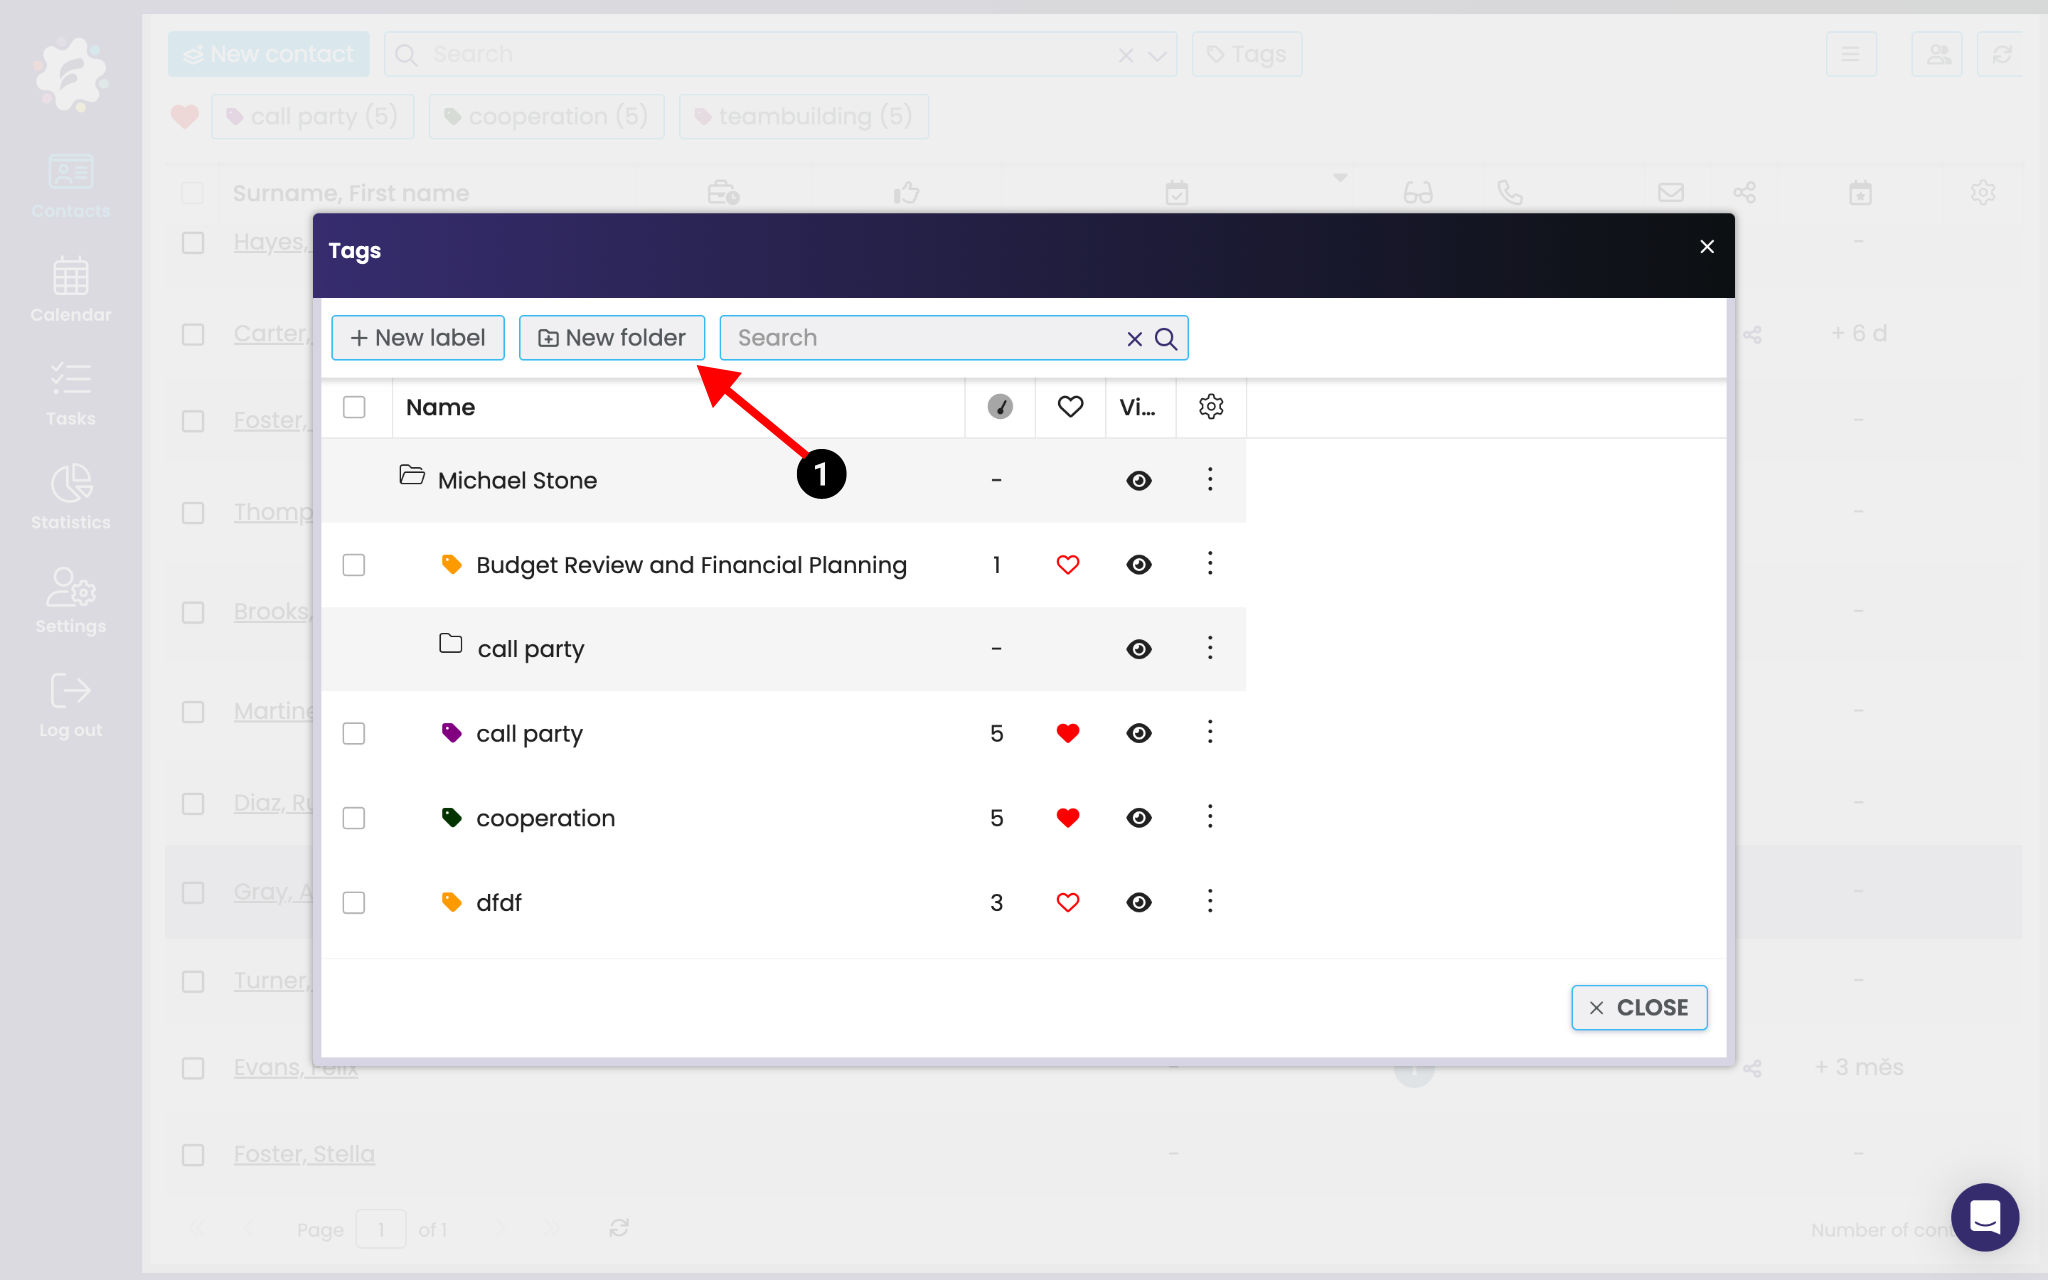
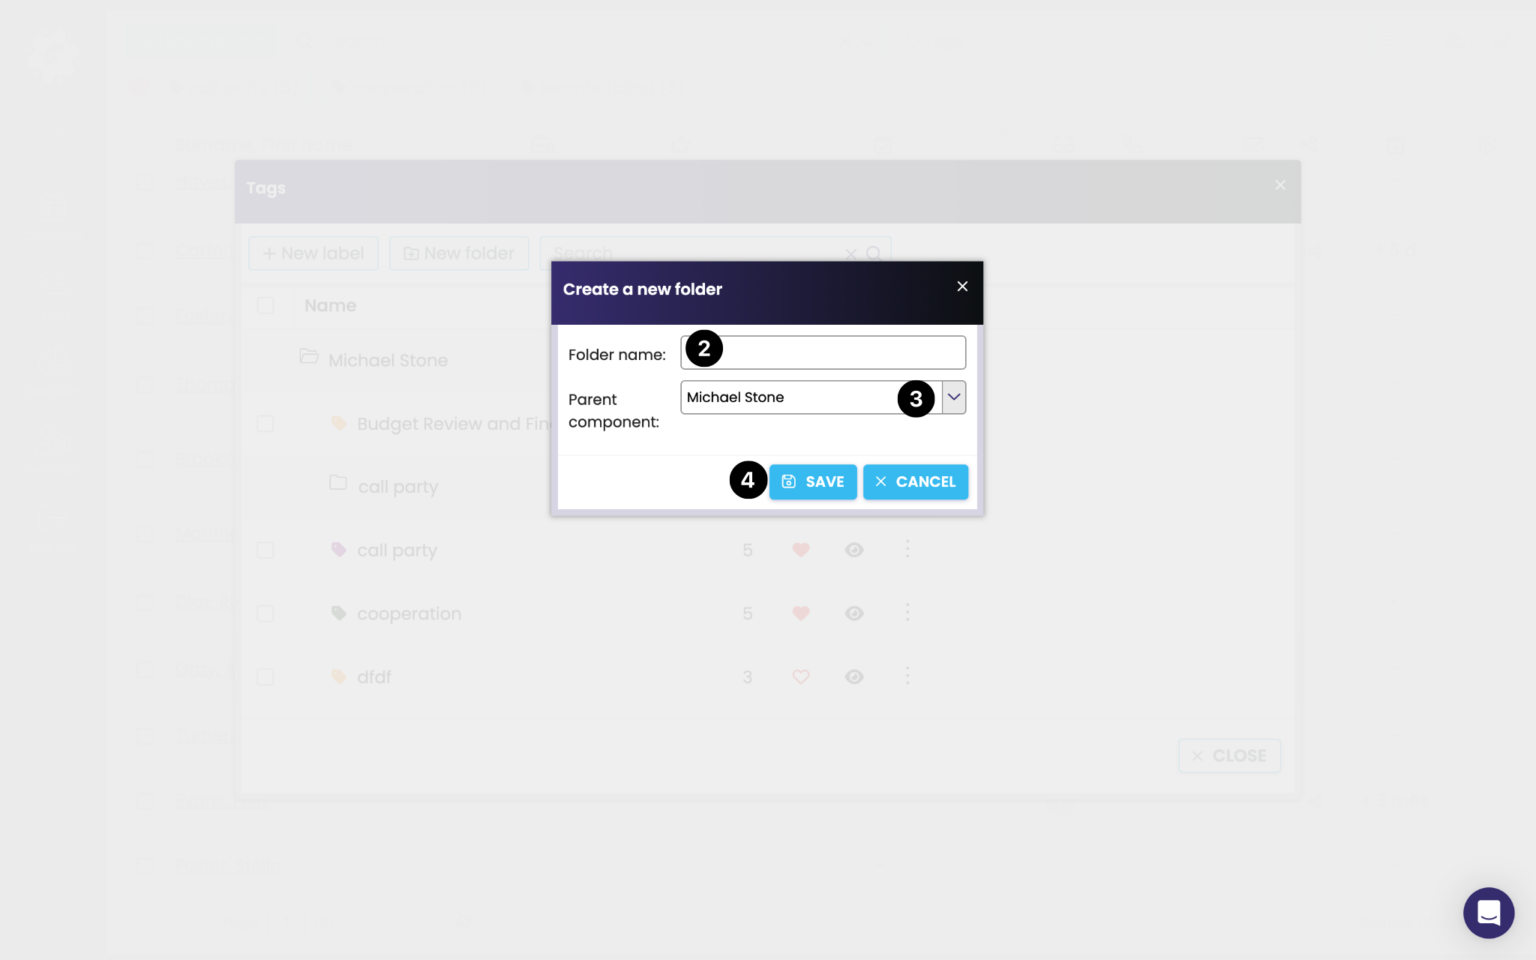
You can create a new folder either by clicking New Folder (1), or right-clicking the three dots and then picking New Folder in the menu. A new window pops up where you set the folder name (4) and its place in the structure (5). Finally, save the folder (6).
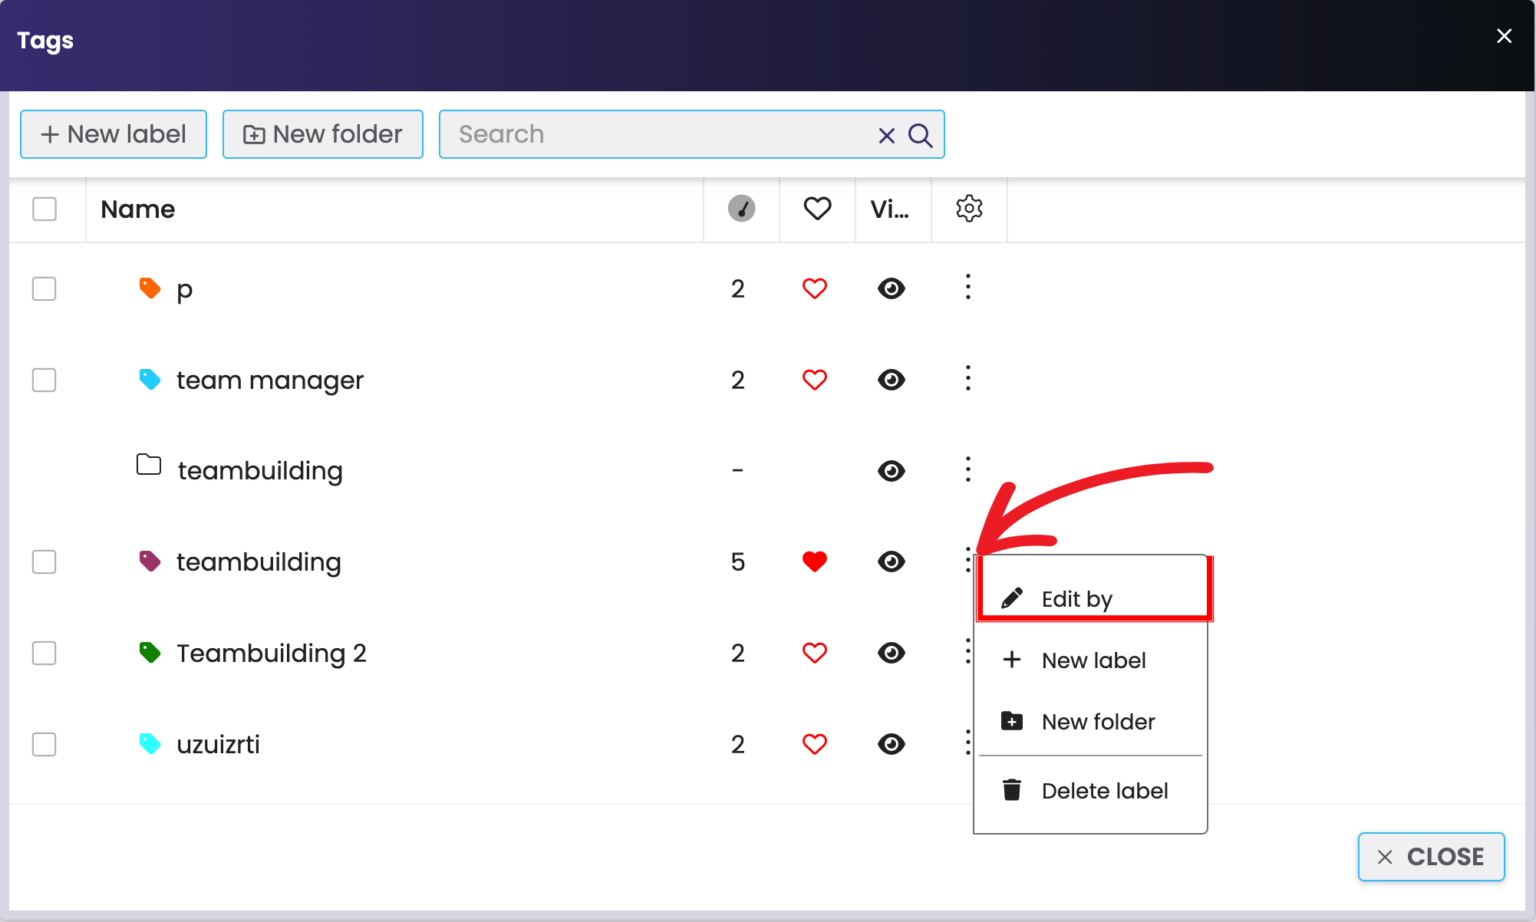
You can edit any tag or folder you've created at any time by right-clicking on the three dots next to the item. Then you'll see a menu where you click Edit by. The same window as when creating a new item will pop up, where you can update the details and then save the changes.
Clicking the three dots brings up a menu where you click Delete tag. The system will ask you if you're sure you want to delete this tag. Deleting the tag also removes it from all labeled contacts (the tag will no longer show up on those contacts).

The same steps for deleting tags also apply to deleting a folder. Only if the folder contains some tags, the system will ask if you want to move them to another folder. If yes, check the Move contents to another folder (1), pick the target folder from the dropdown below (2), and click OK (3). If you want to delete the folder along with its tags, just click OK right away.

